
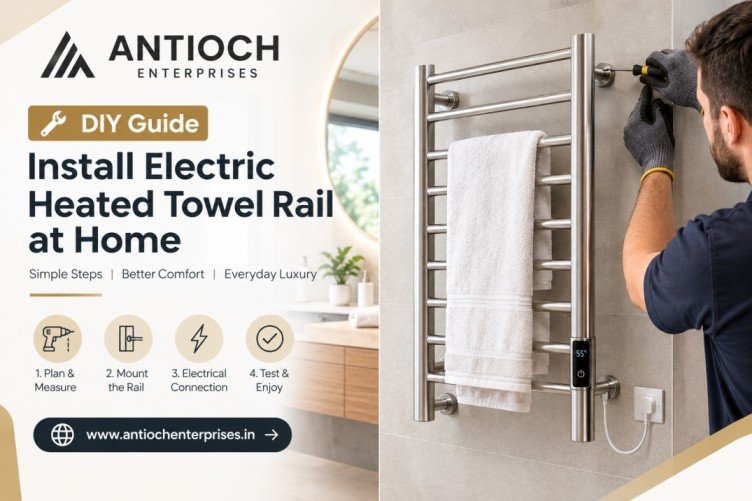
DIY Guide to Install an Electric Heated Towel Rail at Home
A warm towel after a shower can make a cold Canadian morning feel much more comfortable. An Electric Heated Towel Rail is a practical bathroom upgrade that helps warm and dry towels while adding a clean, modern touch to the space. For homeowners looking to improve everyday bathroom comfort, installing a heated towel rail can be a useful project when planned carefully.
Before starting, it is important to understand that electrical installation involves safety considerations. While mounting the rail and preparing the bathroom wall may be suitable for a confident DIY homeowner, the electrical connection should be completed according to local Canadian electrical requirements and, where required, by a licensed electrician.
Why Install an Electric Heated Towel Rail at Home?
Imagine stepping out of a shower on a cold winter morning and reaching for a warm, dry towel instead of a damp one. That simple change is one of the main reasons homeowners choose heated towel rails.
An Electric Heated Towel Rail uses electrical power to heat its internal elements and transfer gentle warmth to the rail. Towels placed across the heated bars gradually become warmer and can dry more effectively between uses.
For Canadian homes, this can be particularly useful during colder months when bathroom humidity and slower towel drying can become everyday concerns. A properly installed unit can also complement modern bathroom designs without requiring major plumbing changes.
What You Need Before Starting the Installation
Good preparation can make Heated Towel Rail Installation much easier. Before drilling any holes, check the product instructions, measure the available wall space, and decide exactly where the rail should sit.
You may need a measuring tape, pencil, spirit level, suitable wall plugs, screws, a drill and the manufacturer’s mounting hardware. The exact tools will depend on the wall material and the towel rail model.
Most importantly, confirm the electrical requirements before installation. The circuit, switch, cable routing, bathroom location and protection requirements should comply with the applicable electrical code in your Canadian province or territory.
Choose the Right Bathroom Location
Location has a major impact on both convenience and safety. A towel rail should be positioned where towels can be placed easily without blocking doors, cabinets or other bathroom fixtures.
Avoid installing the unit where it can be directly exposed to water unless the specific product is designed and approved for that environment. Bathroom electrical zones and required clearances vary depending on the installation and local regulations.
For a Canadian bathroom renovation, it is sensible to discuss the planned position with a qualified electrician before making permanent electrical connections.
Measure the Wall Carefully
Once you have selected the location, measure the wall carefully. Hold the mounting brackets against the wall and mark their positions with a pencil.
Use a spirit level to make sure the rail will sit straight. Even a small alignment error can become noticeable once the rail is installed.
Also check the wall structure before drilling. Different surfaces require different fixing methods. Drywall, tile, concrete and wood framing may all need different anchors or installation techniques.
Check the Electrical Connection
This is one of the most important parts of the project. An Electric Heated Towel Rail should be connected to a suitable electrical supply that matches the manufacturer’s specifications.
Do not simply connect the unit to an existing bathroom circuit without checking whether the circuit is appropriate. Electrical requirements can vary depending on the product, bathroom layout and local Canadian regulations.
Where fixed wiring is involved, have a licensed electrician complete or verify the connection. This helps reduce the risk of electric shock, overheating, incorrect wiring or damage to the appliance.
Step-by-Step Heated Towel Rail Installation
Step 1: Unpack and Inspect the Rail
Carefully remove the heated towel rail from its packaging and check all components. Make sure the mounting brackets, screws, fixing accessories and electrical components are present.
Look for visible damage before beginning the installation. If anything appears damaged or missing, contact the supplier before mounting the unit.
Step 2: Mark the Mounting Points
Use the manufacturer’s template or measurements to mark the required mounting points on the wall.
Check the measurements twice before drilling. The rail should be positioned at a comfortable height and should have enough surrounding space for towels to hang freely.
Step 3: Prepare the Wall
Select fixing hardware suitable for your wall type. For tiled bathrooms, take care when drilling to avoid cracking tiles or damaging hidden pipes and cables.
If you are unsure about what is behind the wall, stop and have the area checked before drilling. This is especially important in bathrooms because water pipes and electrical wiring may run through wall cavities.
Step 4: Install the Mounting Brackets
Secure the brackets using the appropriate fixings. Do not overtighten screws, particularly when working with tile or other brittle surfaces.
Use the spirit level again after securing the brackets. Correcting alignment at this stage is much easier than removing the complete rail later.
Step 5: Attach the Towel Rail
Carefully place the rail onto the mounting brackets according to the manufacturer’s instructions.
Check that it is stable and firmly secured. Gently test the rail by applying light pressure rather than immediately placing several heavy towels on it.
Step 6: Complete the Electrical Connection
The electrical connection should follow the manufacturer’s instructions and applicable Canadian electrical requirements.
If the unit requires fixed wiring, a qualified electrician should handle the connection. The appropriate protection, isolation and switching arrangements depend on the installation.
Never work on a live electrical circuit. Power should be isolated before electrical work begins, and the installation should be tested properly before the towel rail is used.
Step 7: Test the Heated Rail
After the installation and electrical checks are complete, switch the unit on according to the manufacturer’s instructions.
Allow it some time to warm up. The rail may feel warm rather than extremely hot, as towel warmers are generally designed to provide controlled heat rather than operate like a conventional heater.
Check that the unit heats evenly and that there are no unusual sounds, smells or electrical issues.
How to Use a Heated Towel Rack for Bathroom Efficiently
A Heated Towel Rack for Bathroom can be used more efficiently when towels are spread across the bars instead of being tightly bundled together.
Leaving space between towels allows warm air and heat to reach more of the fabric. This can improve drying and help prevent towels from remaining damp for long periods.
If your model includes a timer or temperature control, use those functions according to the manufacturer’s recommendations. There is usually no need to keep the rail operating continuously when the bathroom is not being used.
Common Installation Mistakes to Avoid
One common mistake is choosing the installation position based only on appearance. The rail should also be practical, accessible and suitable for the bathroom’s electrical and water environment.
Another mistake is using unsuitable wall anchors. A heated towel rail needs secure mounting because towels add weight and movement when they are removed.
Avoid drilling without checking for hidden services, and never assume that an existing electrical outlet is automatically suitable for a bathroom heating appliance.
Finally, do not ignore the manufacturer’s installation instructions. Product designs and electrical requirements can vary considerably between models.
How to Keep Your Heated Towel Rail Working Well
Regular cleaning is usually simple. Wipe the surface with a soft, slightly damp cloth and use cleaning products recommended by the manufacturer.
Avoid abrasive cleaners that could damage the finish. If the rail has a polished, painted or specialty finish, follow the care instructions provided with the product.
Inspect the mounting points occasionally to make sure the rail remains secure. If you notice loose fittings, unusual heating behaviour, damaged cables or other problems, stop using the unit and arrange a professional inspection.
Is an Electric Heated Towel Rail Suitable for Canadian Homes?
For many Canadian bathrooms, a heated towel rail can be a practical comfort feature, particularly during colder seasons. It can provide a convenient place to warm and dry towels without requiring the installation of a traditional hydronic heating system.
The most important consideration is correct installation. Homeowners should consider the bathroom layout, electrical supply, wall construction, product specifications and provincial electrical requirements before beginning the project.
If you are comfortable with measuring and basic mounting work, you may be able to prepare the wall and install the mechanical components yourself. Electrical connections, however, should be treated as professional work when required by local regulations.
Final Thoughts
Installing an Electric Heated Towel Rail can add everyday comfort to a modern bathroom while providing a practical way to warm and dry towels. With accurate measurements, suitable wall fixings, careful positioning and proper electrical installation, it can become a useful part of a Canadian bathroom.
For homeowners exploring different designs, sizes and finishes, Antioch Enterprises provides heated towel rail solutions designed for modern bathroom applications. Choosing a suitable model and following professional installation guidance can help ensure safe, reliable and convenient everyday use.
Pricing Guide — What to Expect in 2026
| Type | Size | Price Range |
| Vertical Single Bar (Round) | 800mm–1200mm | ₹2,599 – ₹3,799 |
| Vertical Single Bar (Square) | 800mm–1200mm | ₹2,799 – ₹3,999 |
| Horizontal Single Bar (Round) | 450mm–850mm | ₹1,099 – ₹1,699 |
| Horizontal Single Bar (Square) | 450mm–850mm | ₹1,599 – ₹2,299 |
| Miter Joint Ladder Rail | 600×400mm | ₹6,100 – ₹8,600 |
| Miter Joint Ladder Rail | 800×500mm | ₹7,300 – ₹12,100 |
| Rail with Shelf | 600×500mm | ₹8,600 – ₹14,200 |
| Rail with Shelf | 900×500mm | ₹9,400 – ₹15,600 |
Frequently Asked Questions
1. Can I install an electric heated towel rail myself?
You can usually handle basic measuring and mechanical mounting if you are comfortable with DIY work. However, electrical connections should be completed by a qualified professional when required by Canadian electrical regulations.
2. Where should a heated towel rail be installed?
It should be placed somewhere convenient for hanging towels while maintaining the required clearance from water sources and other bathroom fixtures. Always follow the product instructions and local electrical requirements.
3. Does an electric towel rail need a dedicated circuit?
The requirement depends on the model, electrical load and existing bathroom circuit. A qualified electrician can determine whether the available circuit is suitable for the particular towel rail.
4. Can I install a heated towel rail on a tiled wall?
Yes, many heated towel rails can be mounted on tiled walls when the correct drilling technique and suitable wall fixings are used. Care should be taken to avoid cracking tiles or hitting hidden services.
5. How long does a heated towel rail take to warm up?
Warm-up time varies by model, wattage, room conditions and construction. Some rails begin feeling warm relatively quickly, while reaching their normal operating temperature may take longer.
6. Is a heated towel rack useful during Canadian winters?
It can be particularly convenient during colder months because towels may take longer to dry naturally in cool or humid bathroom conditions. A heated rack can provide a warm place to dry towels between uses.
7. How can I reduce electricity use?
Use the timer or controls when available, avoid running the rail unnecessarily for long periods, and place towels across the bars rather than bundling them together. Following the manufacturer’s recommended operating settings can also help.
Explore Related Articles:-
Smart Heated Towel Rails 2026: App & Voice-Controlled Bathroom Heating
Enhance Your Bathroom with Premium Designer Towel Warmers
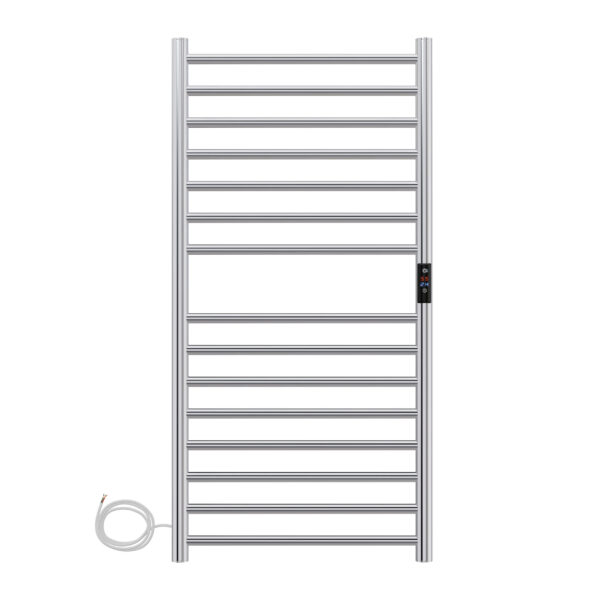

Premium SS Round Heated Towel Rail with Temperature & Timer Control


SS Round Heated Towel Rail – 1200mm x 425mm with Temperature & Timer Control


SS Round Heated Towel Rail – 800mm x 500mm with Temperature & Timer Control

SS Round Miter Joint Heated Towel Rail – 600mm x 400mm

